Table of Contents
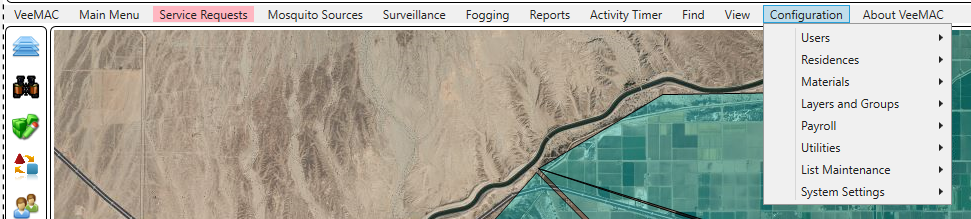
Users
VeeMAC Users
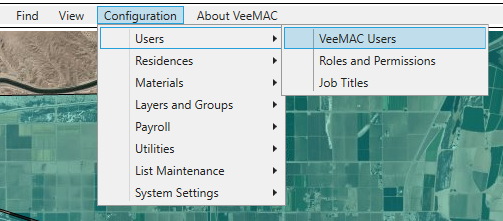
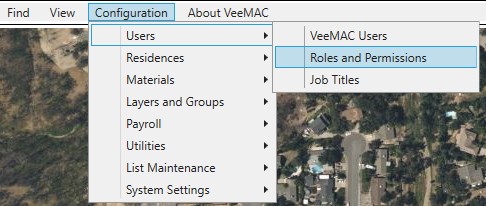
From top menu choose Configuration > Users > VeeMAC Users
Edit existing users by selecting one from the Employee List.
User Information: Create a new user by clicking Add New at the bottom left, this will set the page up for adding a new user.
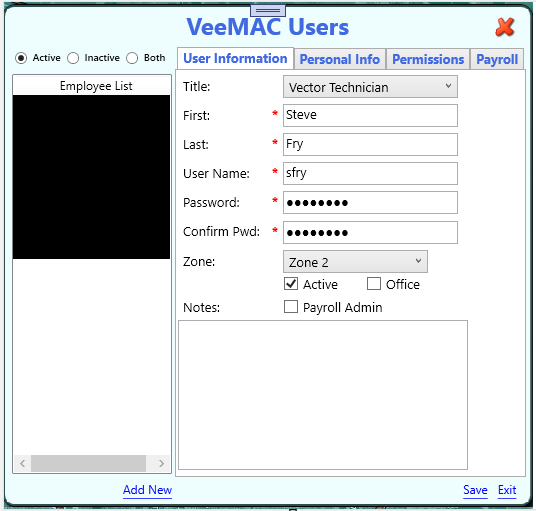
Title: This list can be altered, See Job Titles.
Zone: For a technician you can assign a zone, this will send an alert to the technician when a new Service Request is created. For all other users leave Zone blank.
Active: If technician is no longer employed unchecking Active will remove technician from all selections.
Office: Is checked for office staff, this will give them access to tools specifically for office staff and managers.
Payroll Admin: Specifically for employees that need more access into the payroll system.
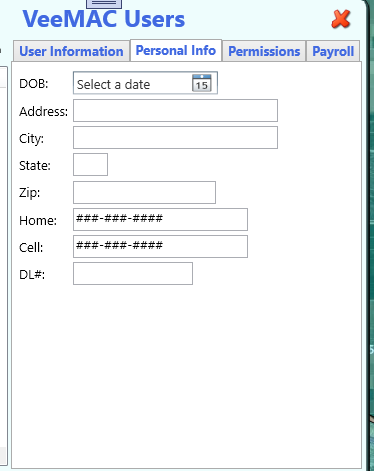
Personal Info: Nothing is required on this page.
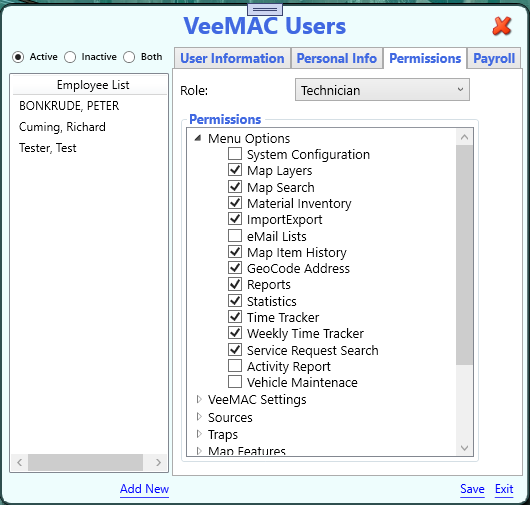
Permissions: This list can be altered, see Roles.
Role: Select the role that best fits employee.
Permissions list: If the Role is set as customizable you can add/remove permissions for that user. In the example, I’ve chosen Technician as the Role. The Technician role by default has these permissions.
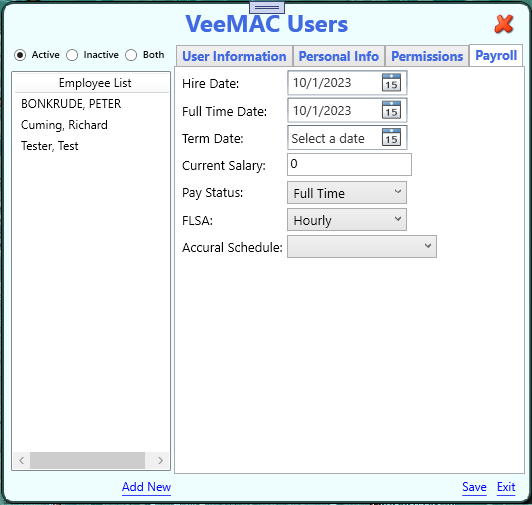
Payroll: Even if you are not using payroll it’s still a good idea to fill out Hire Date, Full Time Date, Pay Status, and FLSA.
Accrual Schedule: This is district specific and will need to be set up with help from VeeMAC.
Click Save.
Top of Page
Roles and Permissions
From top menu choose Configuration > Users > Roles and Permissions
Edit existing Roles and Permissions by selecting one from the Roles List or click Add New to create a new Role with Permissions.
- Role: type in a Role name.
- Active: Active checked will make this role available throughout the system.
- Customizable: If Role is customizable when it is assigned to an employee the default permissions can be altered by selecting or removing permissions from the default permissions.
- Permissions list: If the parent node is blank then none of the child nodes are checked, a black squire means some of the child nodes are checked, and checked means all child nodes are checked.

Top of Page
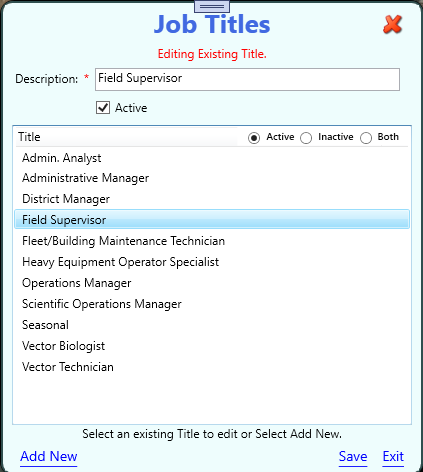
Job Titles
From top menu choose Configuration > Users > Job Titles
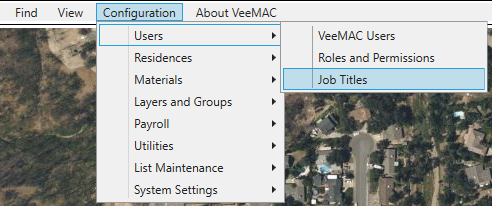
Edit existing Job Titles by selecting one from the List or click Add New to create a new Job Title.
- Description: Name of Job Title.
- Active: Checked, job title is available in system.
Top of Page
Residences
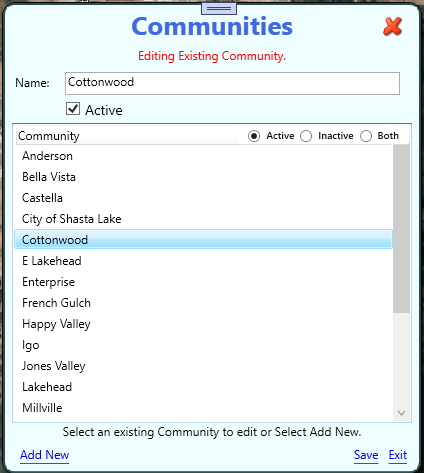
Communities
From top menu choose Configuration > Residence> Communities
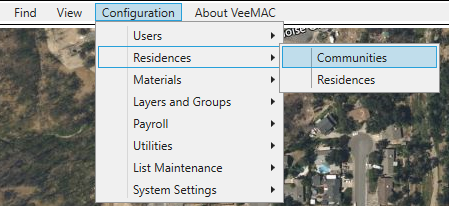
Edit existing Communities by selecting one from the List or click Add New to create a new Community.
- Description: Name of Community.
- Active: Checked, community is available in system.
Top of Page
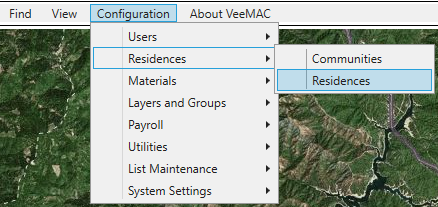
Residences
From top menu choose Configuration > Residences> Residences
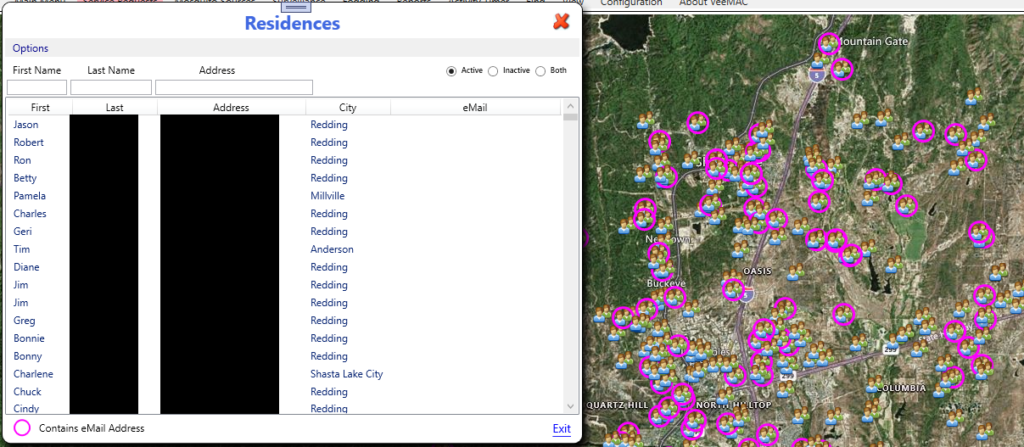
Right click on existing resident from list gives options.
- Edit Resident
- Counter Services (see Counter Services)
- eMail selected Resident
- Filter by first or last name and/or address
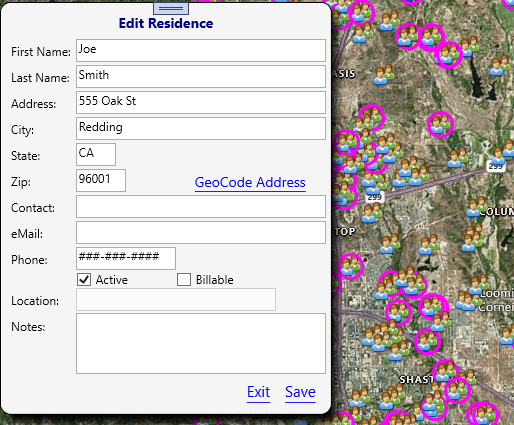
Adding/Edit a resident:
- After entering a address clicking on GeoCode Address will put the point on the map to that location and return the latitude and longitude.
- Adding an email address will put the halo around the resident icon as an indication that there is a email assigned to that resident.
From the Options at the top left:
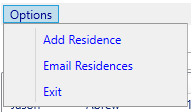
- Add Resident (same as edit above but clean fields)
- Email residence
- Exit
To Email an area of residences, click on Email Residences from options.
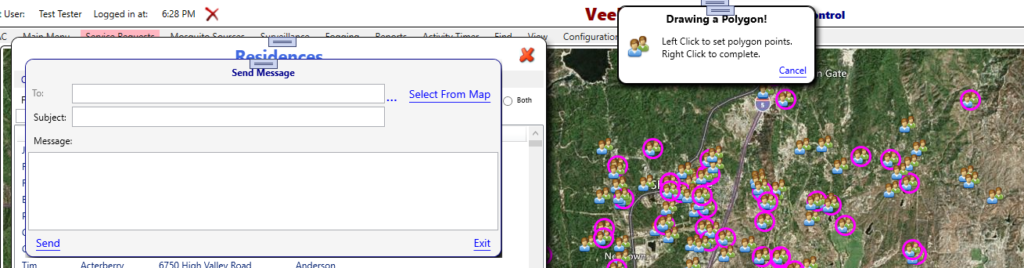
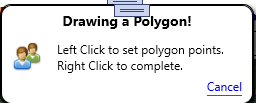
On the map left click to create a polygon around the group of residences then right click to finish the polygon.
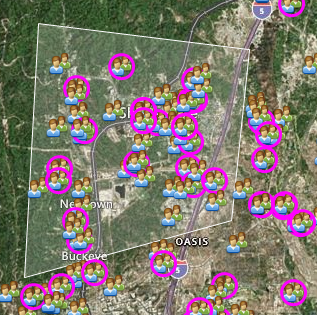
Clicking on the … will produce a list of the residences within the polygon that have a location and email address.
Add a Subject and Message and click Send.
Top of Page
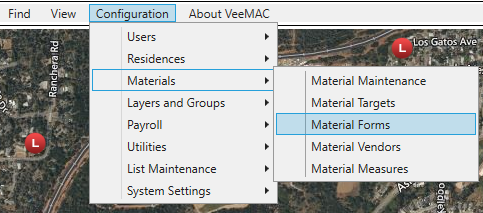
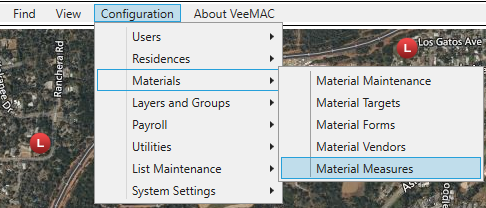
Materials
Material Maintenance
From top menu choose Configuration > Materials > Material Maintenance
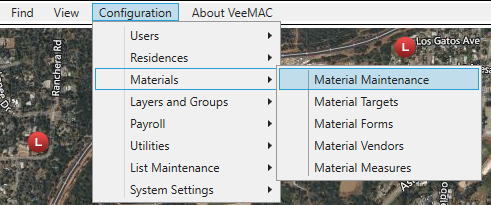
This is where you can add/edit materials, Unchecking Active if not in use by district will remove it from other pages, in the feature it can be set back to active and useable.
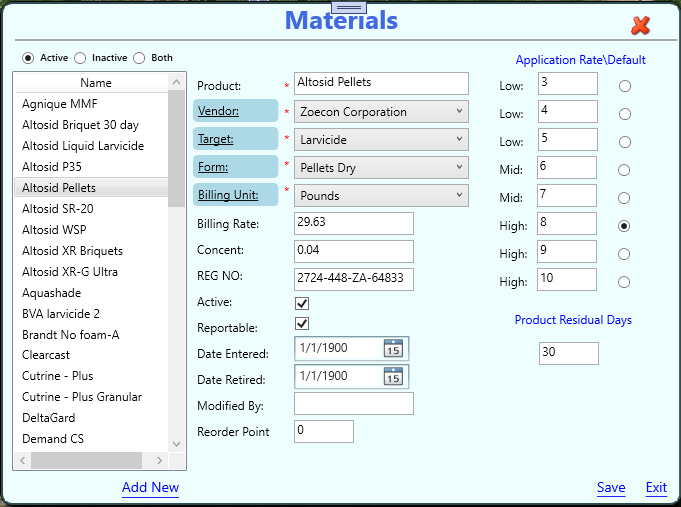
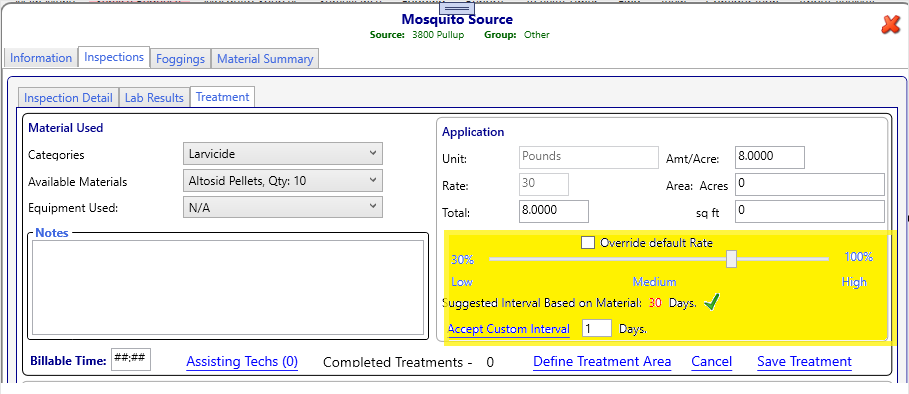
Application Rate\Default: When using a material on a treatment the rate slider bar will give you the increments and will default to the selected default rate, this can be overridden. The suggested interval is set as default but can be overridden by entering the days in the text box and clicking the link Accept Custom Interval.
Product Residual Days: Days product is good for, is used in setting the next inspection date.
Top of Page
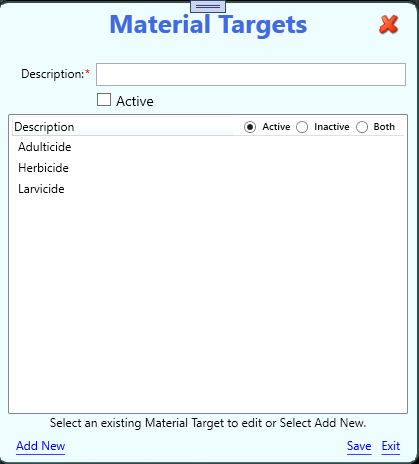
Material Targets
From top menu choose Configuration > Materials > Material Targets
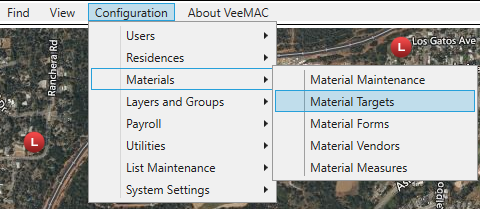
Edit existing Material Targets by selecting one from the List or click Add New to create a new Material Target. Click Save to save changes or Exit.
Top of Page
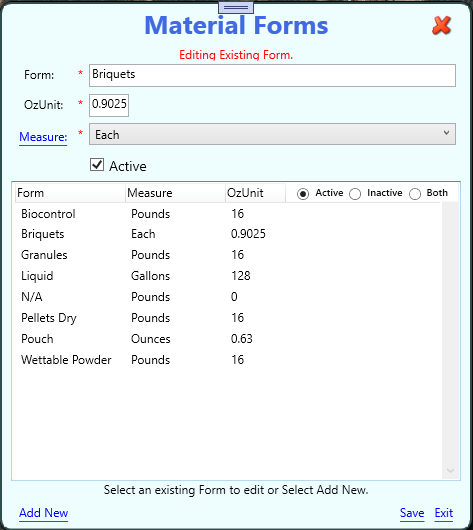
Material Forms
From top menu choose Configuration > Materials > Material Forms
Edit existing Material Forms by selecting one from the List or click Add New to create a new Material Form. Click Save to save changes or Exit.
Top of Page
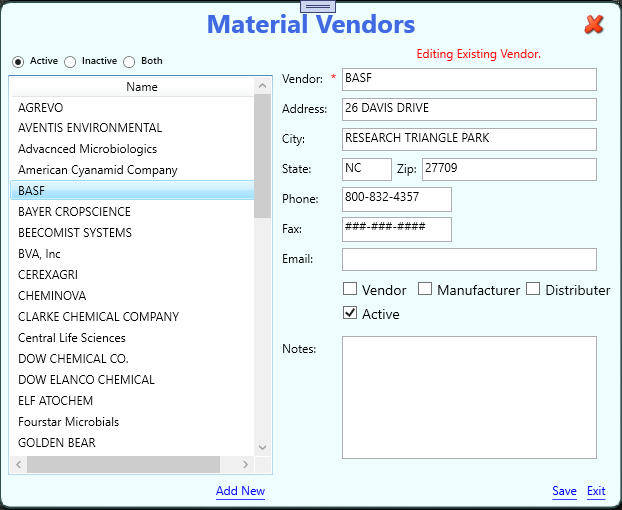
Material Vendors
From top menu choose Configuration > Materials > Material Vendors
Edit existing Material Vendors by selecting one from the List or click Add New to create a new Material Vendor. Click Save to save changes or Exit.
Top of Page
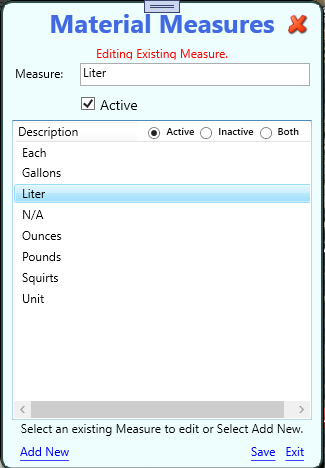
Material Measures
From top menu choose Configuration > Materials > Material Measures
Edit existing Material Measure by selecting one from the List or click Add New to create a new Material Measure. Click Save to save changes or Exit.
Top of Page
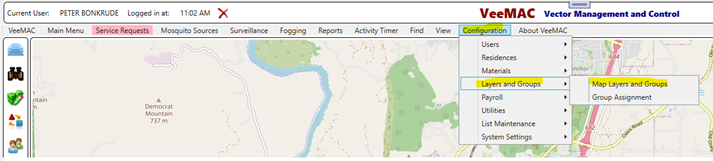
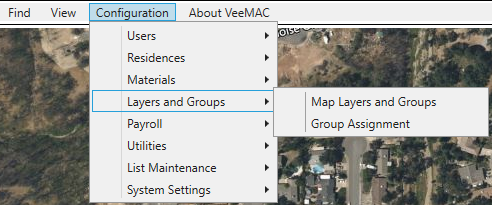
Layers and Groups
Map Layers and Groups
From top menu, Configuration > Layers and Groups > Map Layers and Groups.
Click on Add Layer, I’m calling this layer Service Request (point).
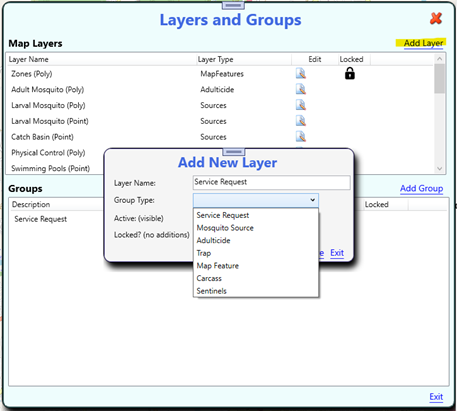
You can create as many layers as you want. A layer will contain one or many groups which you create. As an example, you might have a layer named Service Request and under this layer you might have groups named Service Request, Neg Swimming Pool, Rodent, and Fogging request. Every group can have different symbology (for point) or colors (for polygon or line).
- The Group Type has workflows and metadata specifically for each type.
- Service Request – for service request data and workflow.
- Mosquito Source – for any type of source, pond, catch basin, water trough, etc…. data and workflow.
- Adulticide – if you choose you can create Adulticides, this creates permanent areas to start fogging routes and view historical data contained within that area. You can also do global fogging routes by just clicking Fogging > Start Fogging Route (F7). This option will allow you to run fogging routes that are not tied to an Adulticide area and can be viewed by date/time.
- Trap – for traps data and workflow.
- Map Feature – used for things like Zones, Avoidance areas, Rodents, and Ticks data and workflow.
- Carcass – for Carcass data and workflow.
- Sentinels – for Sentinels data and workflow.
In this example I’ve chosen the group type of Service Request.
- Active – This layer is active and will display on the map, uncheck Active will not be displayed on the map and will not be available in any of the selection/display options.
- Locked – Won’t allow any additions under this group.
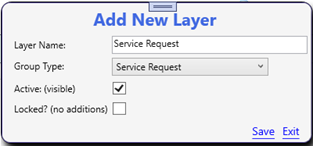
Click Save, then select Add Group.
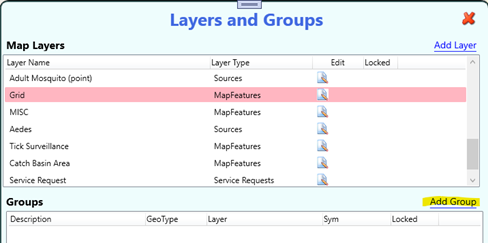
- Group Name: Chose a name for the group.
- Default Geo Type: In this case I want all new Rodent Service Request to be created as a point.
- Limit to this Geo Type: Checked you can only create points, unchecked you can create point, poly, or a line.
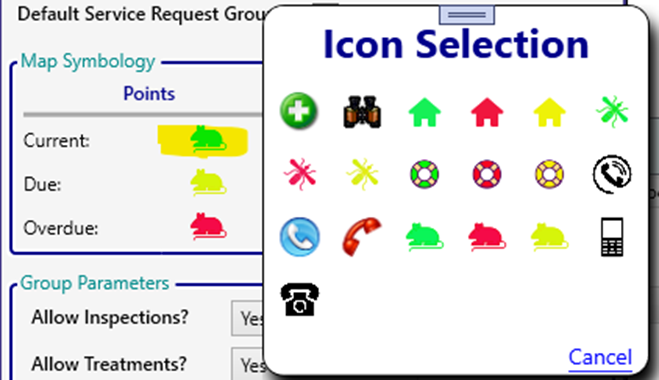
- Current: Is the icon that will be displayed on the map.
- Due: Is the icon that will be displayed on the map if the next inspection date is within 3 days.
- Overdue: Is the icon that will be displayed on the map if the next inspection date is 2 days past.
Days Prior and Days After can be assigned.
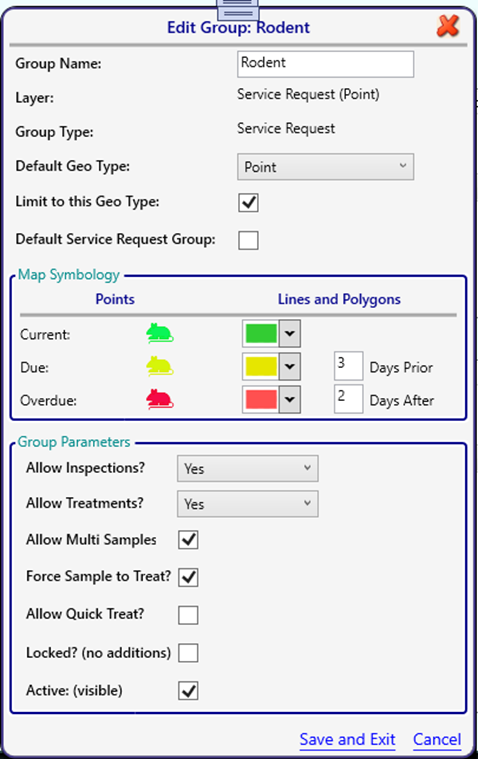
Clicking on the icon next to Current will give you the selection of icons that have been designated as service request icons.
Top of Page
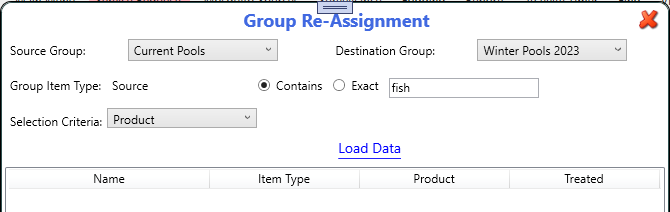
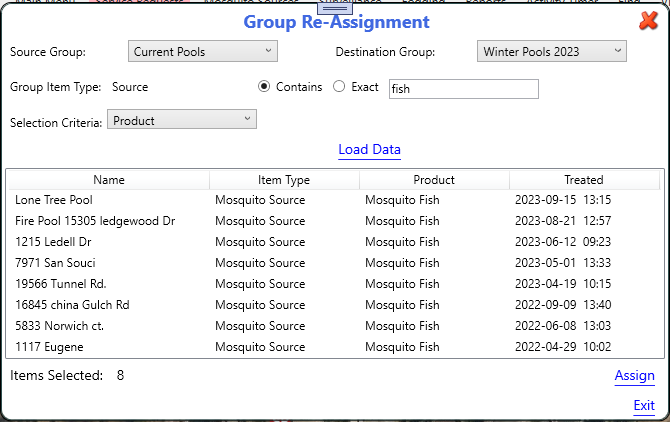
Group Assignment
From top menu, Configuration > Layers and Groups > Group Assignment.
The Group Assignment tool allows you to take sources from one group and move them to another group. In the example below I’m looking in the Source Group Current Pools and I want to move anything that was treated with any product that contains the word Fish to the group Winter Pools 2023.
- Source Group: Group to search from.
- Destination Group: This is where I will move the selected sources to.
- Selection Criteria: Contains:
- All: Select every source in the Source Group.
- Map Selection: Draw a polygon around an area, every source that belongs to the selected Source Group will be selected.
- Last Inspected Date: This will give you options of:
- On or before the last inspection date.
- On or after the last inspection date.
- Between, inspection date between two dates.
- Last Treated Date: Same options as above.
- Never Treated: Sources that have never been treated.
- Name: Use the Contains or Exact to filter sources.
- Product: Use the Contains or Exact to filter sources.
After choosing criteria click Load Data.
If you are happy with the selected sources, click Assign.
Top of Page
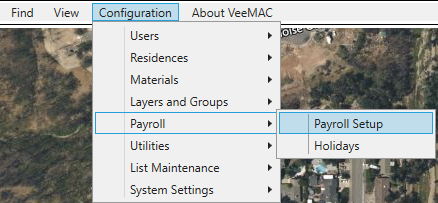
Payroll
Payroll Setup
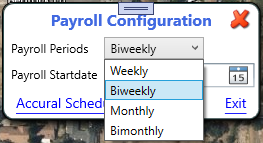
From top menu, Configuration > Payroll > Payroll setup.
Payroll Periods: Select between Weekly, Biweekly, Monthly, or Bimonthly pay periods.
Payroll Start date: Date when district starts VeeMAC Payroll.
Top of Page
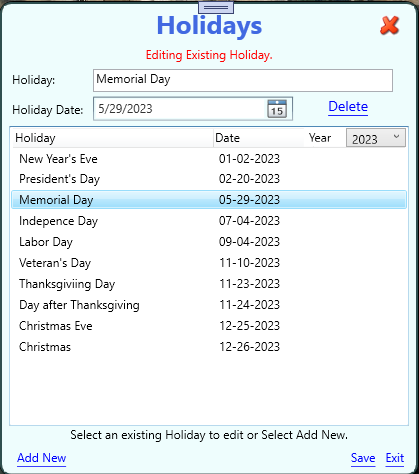
Holidays
From top menu, Configuration > Payroll > Holidays.
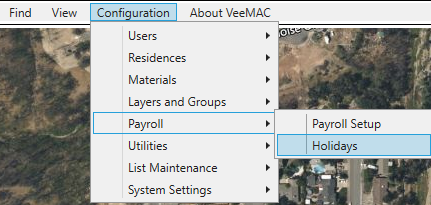
Holidays are used in the payroll system to automatically pay employees for holidays. This tool gives you the ability to add/edit entries.
Top of Page
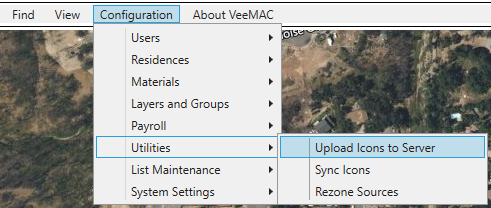
Utilities
Upload Icons to Server
From top menu, Configuration > Utilities> Upload Icons to Server.
If you want an icon that you don’t currently have saved to your computer, see Getting Icons into VeeMAC
Click Find Files and navigate to the location that you have saved your new icons, mine are saved to C:\DownloadesIcons.
The dropdown Choose Folder, this is where the new icons will be available to use. I have chosen servicereq so I can associate it to a mosquito fish service request in Map Layers and Groups.
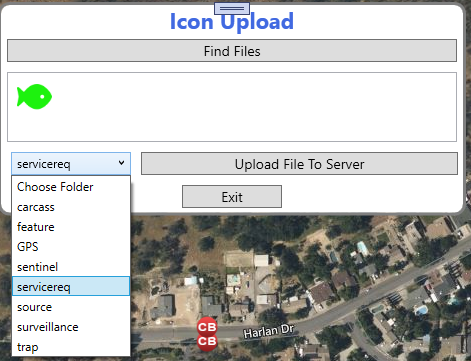
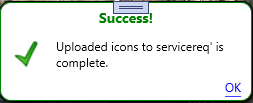
Click Upload File To Server.
Top of Page
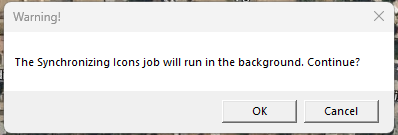
Sync Icons
From top menu, Configuration > Utilities> Sync Icons.
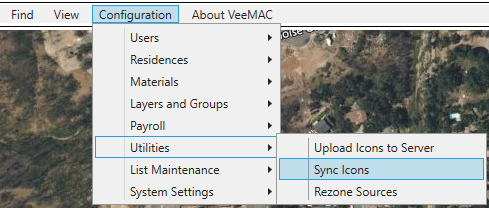
This tool is for updating icons on the map, If you have added and changed Icons on a group you can run the tool to get the new icons to show up, this should only have to be done once and only after changing icons.
Top of Page
Getting Icons into VeeMAC
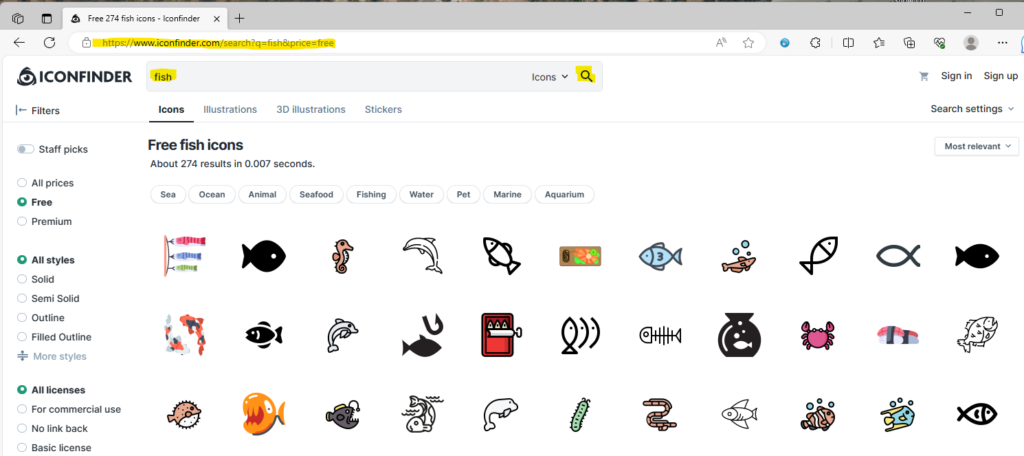
If you want an icon that you don’t currently have saved to your computer, follow these steps.
For free icons I like this site Free icons – Iconfinder. The nice thing about this site is the ability to search and select an icon and save it in different colors.
Below I searched for fish icons and selected the solid black fish.
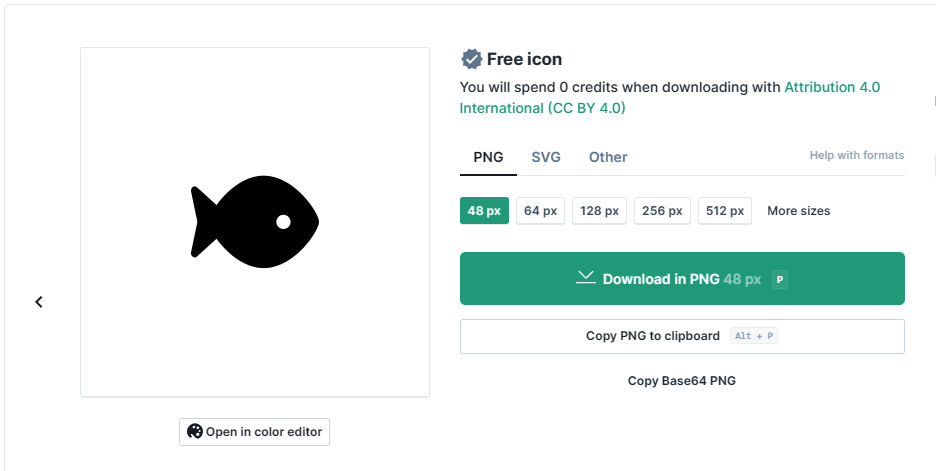
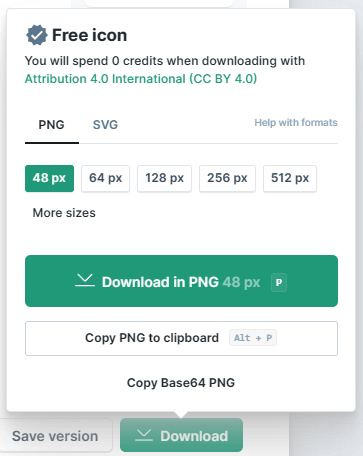
After choosing the solid black fish, I want to select PNG file and 48 px.
Next click Open in color editor.
In the color editor you can create the three different colors for representing the status of a source.
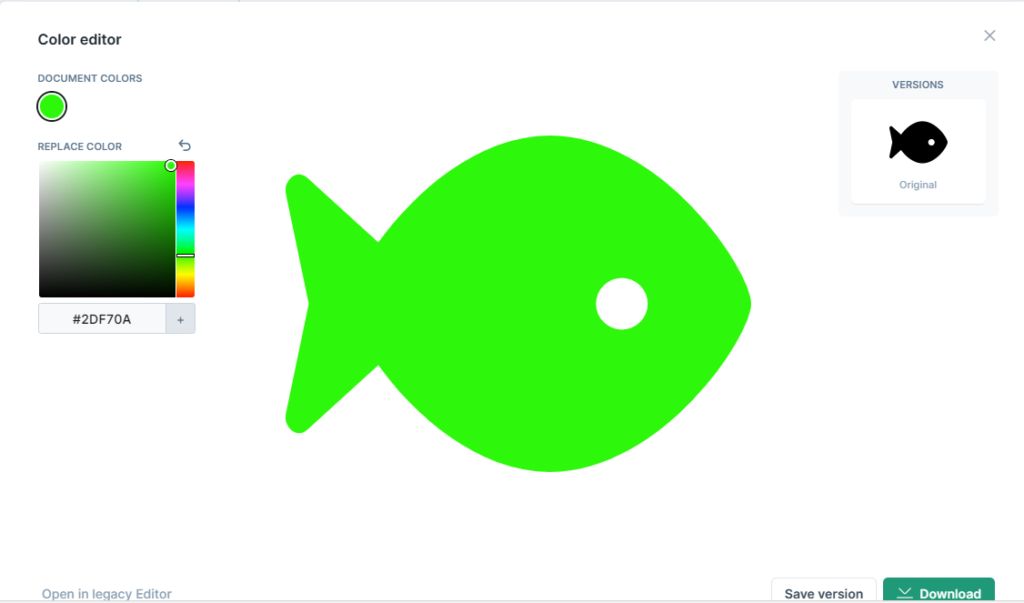
After a color has been chosen click Save version then click Download. In the download screen chose PNG and 48 px. Then Download in PNG 48 px.
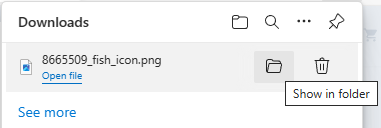
After file has been downloaded I go to Show in folder (Downloads).
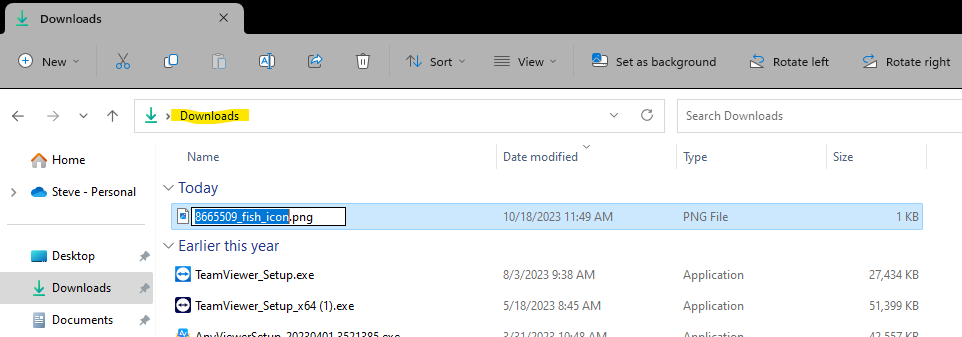
At this point I rename the file and save it to my C drive in a location I can find later. Maybe create a folder C:\DownloadedIcons.
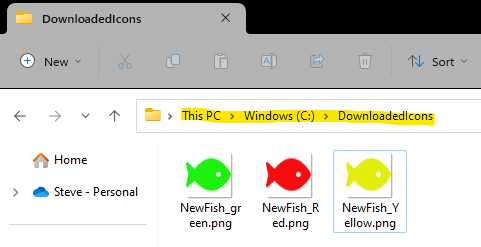
This is my C:\DownloadedIcons folder after creating green, yellow, and red icons.
Top of Page
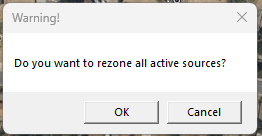
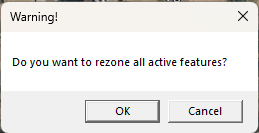
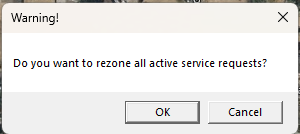
Rezone Sources
From top menu, Configuration > Utilities> Rezone Sources.
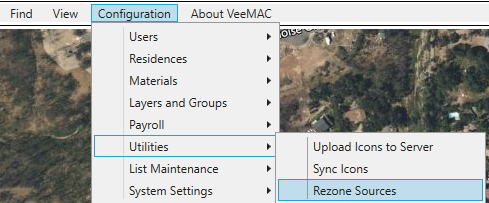
This tool is good for rezoning sources, features, and service request after altering your zone boundaries.
The first opportunity is to rezone sources.
Next would be features.
And last would be service request.
Top of Page
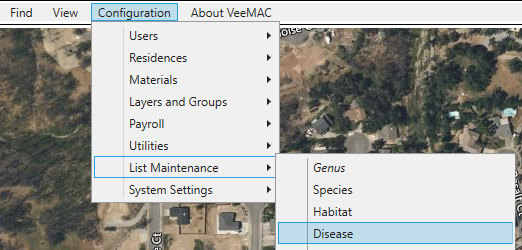
List Maintenance
Genus
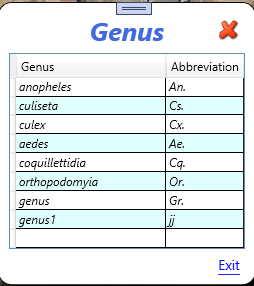
From top menu, Configuration > List Maintenance > Genus.
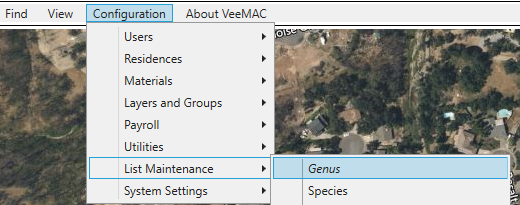
Add/Edit Genus and Genus abbreviations.
Top of Page
Species
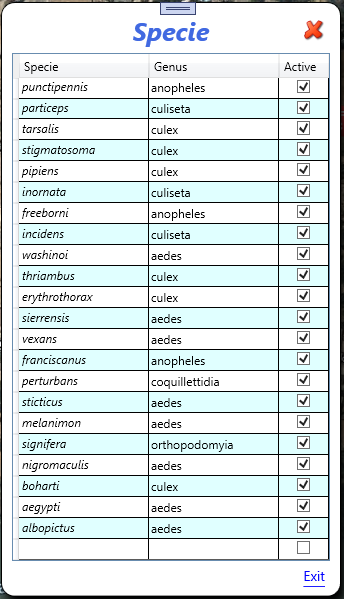
From top menu, Configuration > List Maintenance > Species.
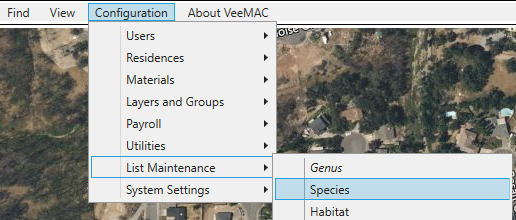
Add/Edit Specie, Genus, and set active. Unchecking the Active box will clean up any views on Species and only show the Active ones.
Top of Page
Habitat
From top menu, Configuration > List Maintenance > Habitat.

Add/Edit Habitat, Abbreviations, Group, and Active. Unchecking the Active box will clean up any views on Habitats and only show the Active ones.
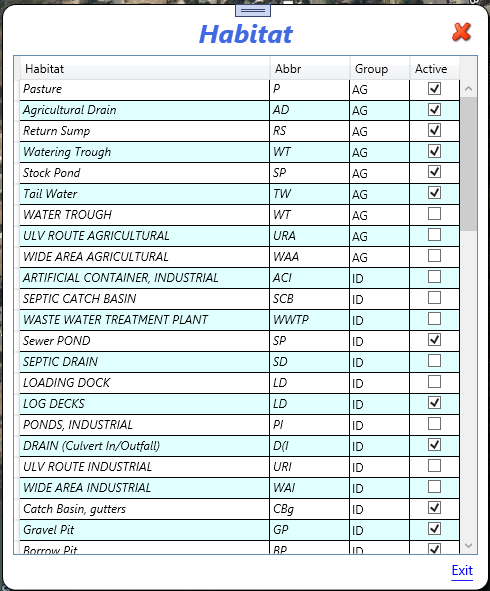
Top of Page
Disease
From top menu, Configuration > List Maintenance > Disease.
Add/Edit Disease, Group, and Active. Unchecking the Active box will clean up any views on Disease and only show the Active ones.
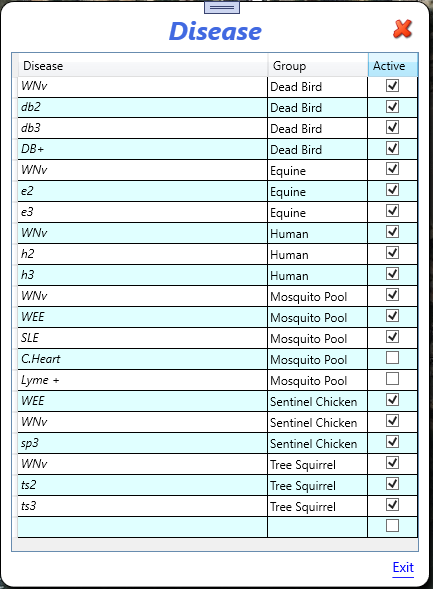
Top of Page
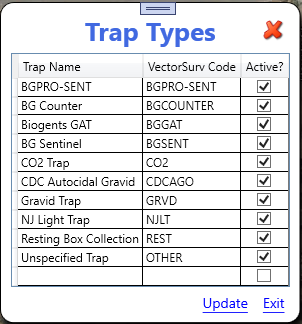
Trap Types
From top menu, Configuration > List Maintenance > Trap Types.
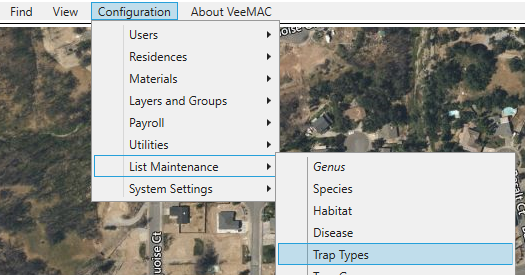
Choose Trap, VectorSurv Code, and Active. Unchecking the Active box will clean up any views on Trap Type and only show the Active ones.